WordPress comes out with some powerful tools to manage media on your blog, but it lacks one essential feature: it doesn’t allow users to replace media files. If you want to change an image (or any any other media file) on your website, you would normally have to manually update all URLs of the old image.
Time needed: 5 minutes.
In this guide I’ll show you how to easily replace existing media files such as images, videos, PDFs, in your WordPress website.
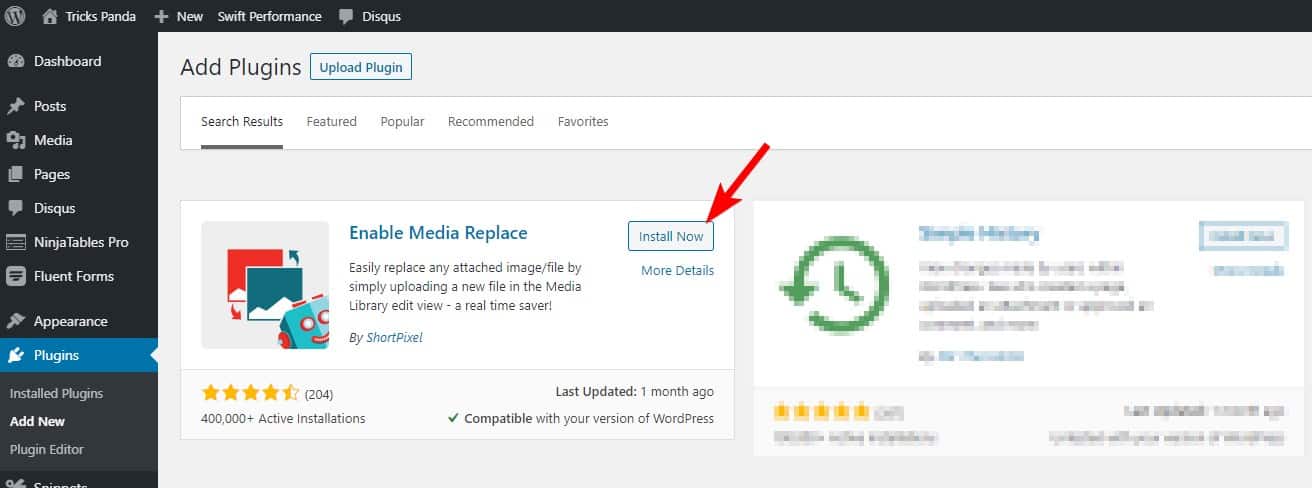
- Install and activate Enable Media Replace from the WordPress plugin repository
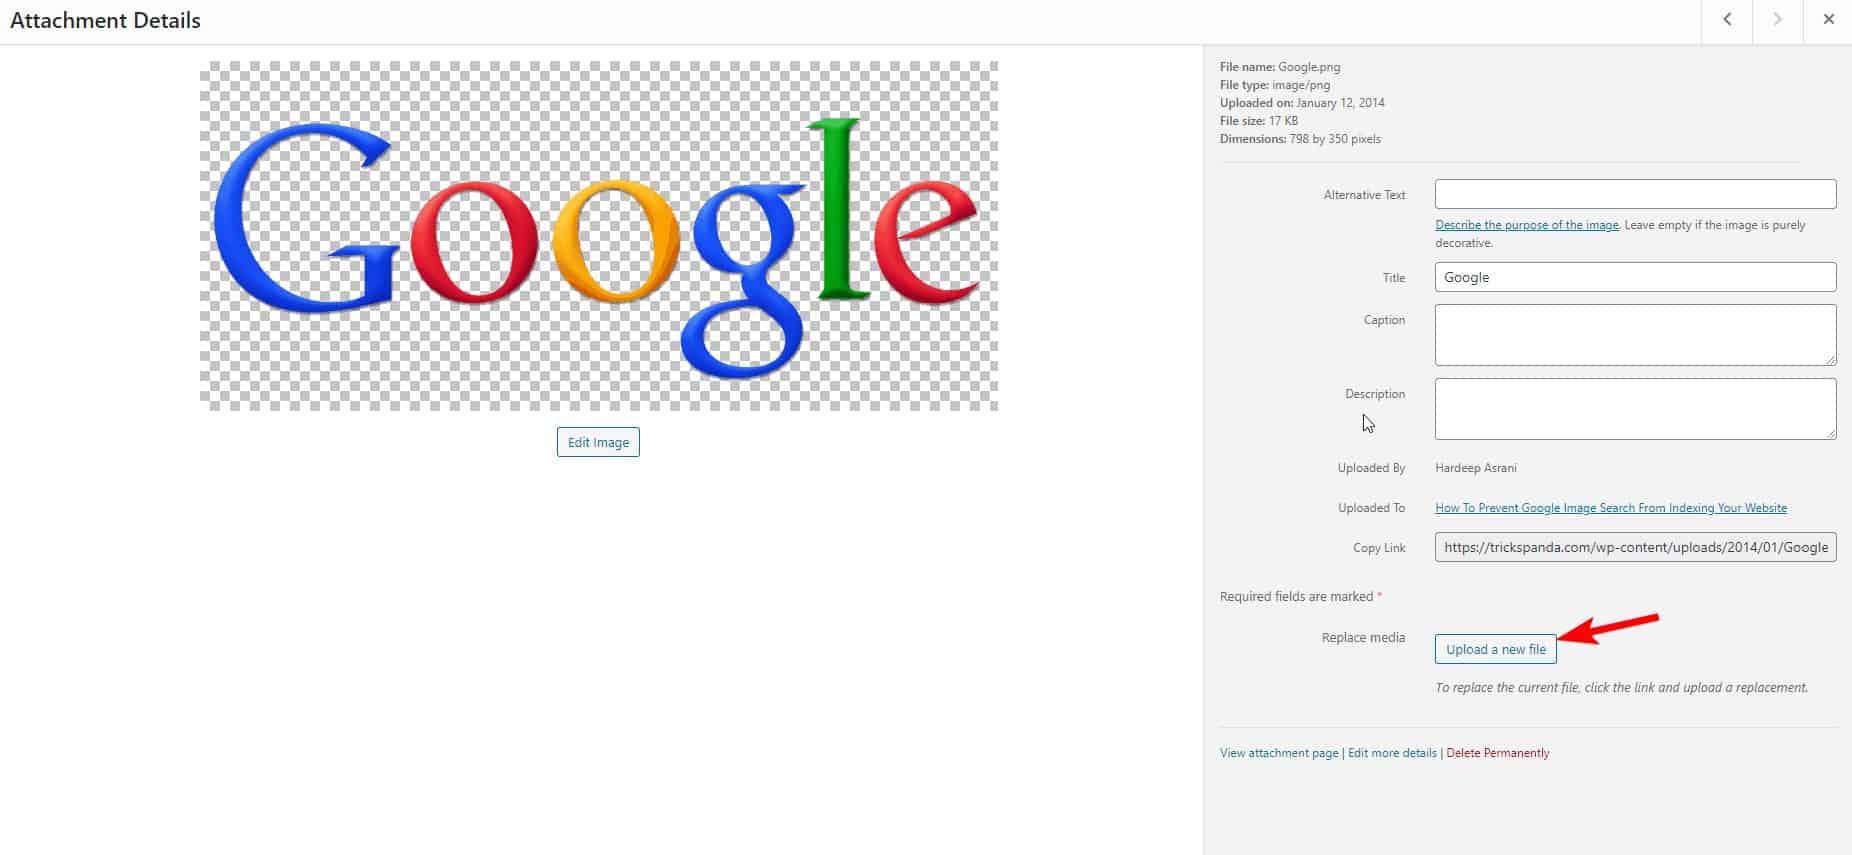
- Go to Media → Library, select the image which you want to replace and click on “Upload a new file”
I will replace an outdated Google logo I used in some of the older articles with the current logo.
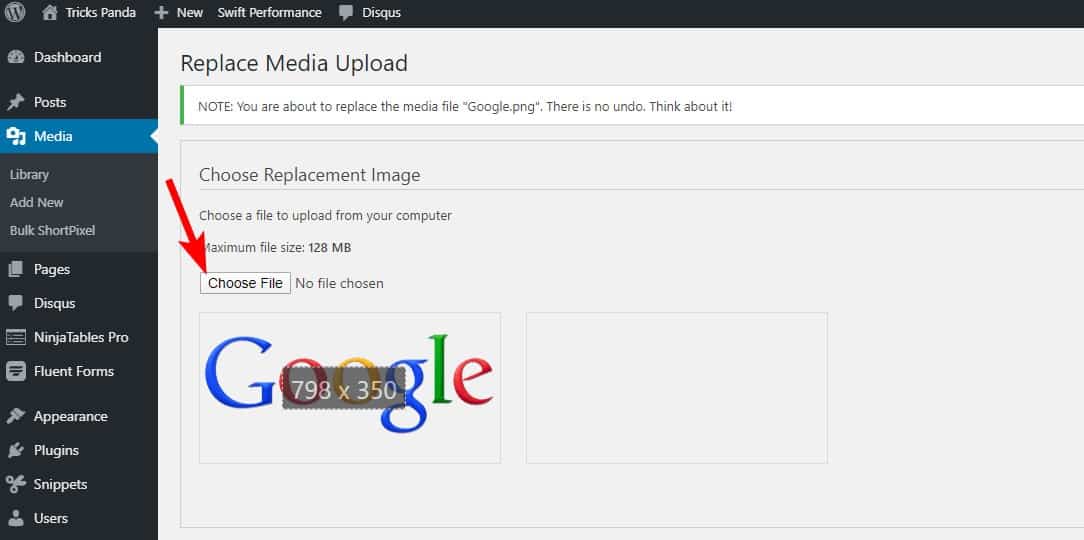
- Click on “Choose file” to select the new image
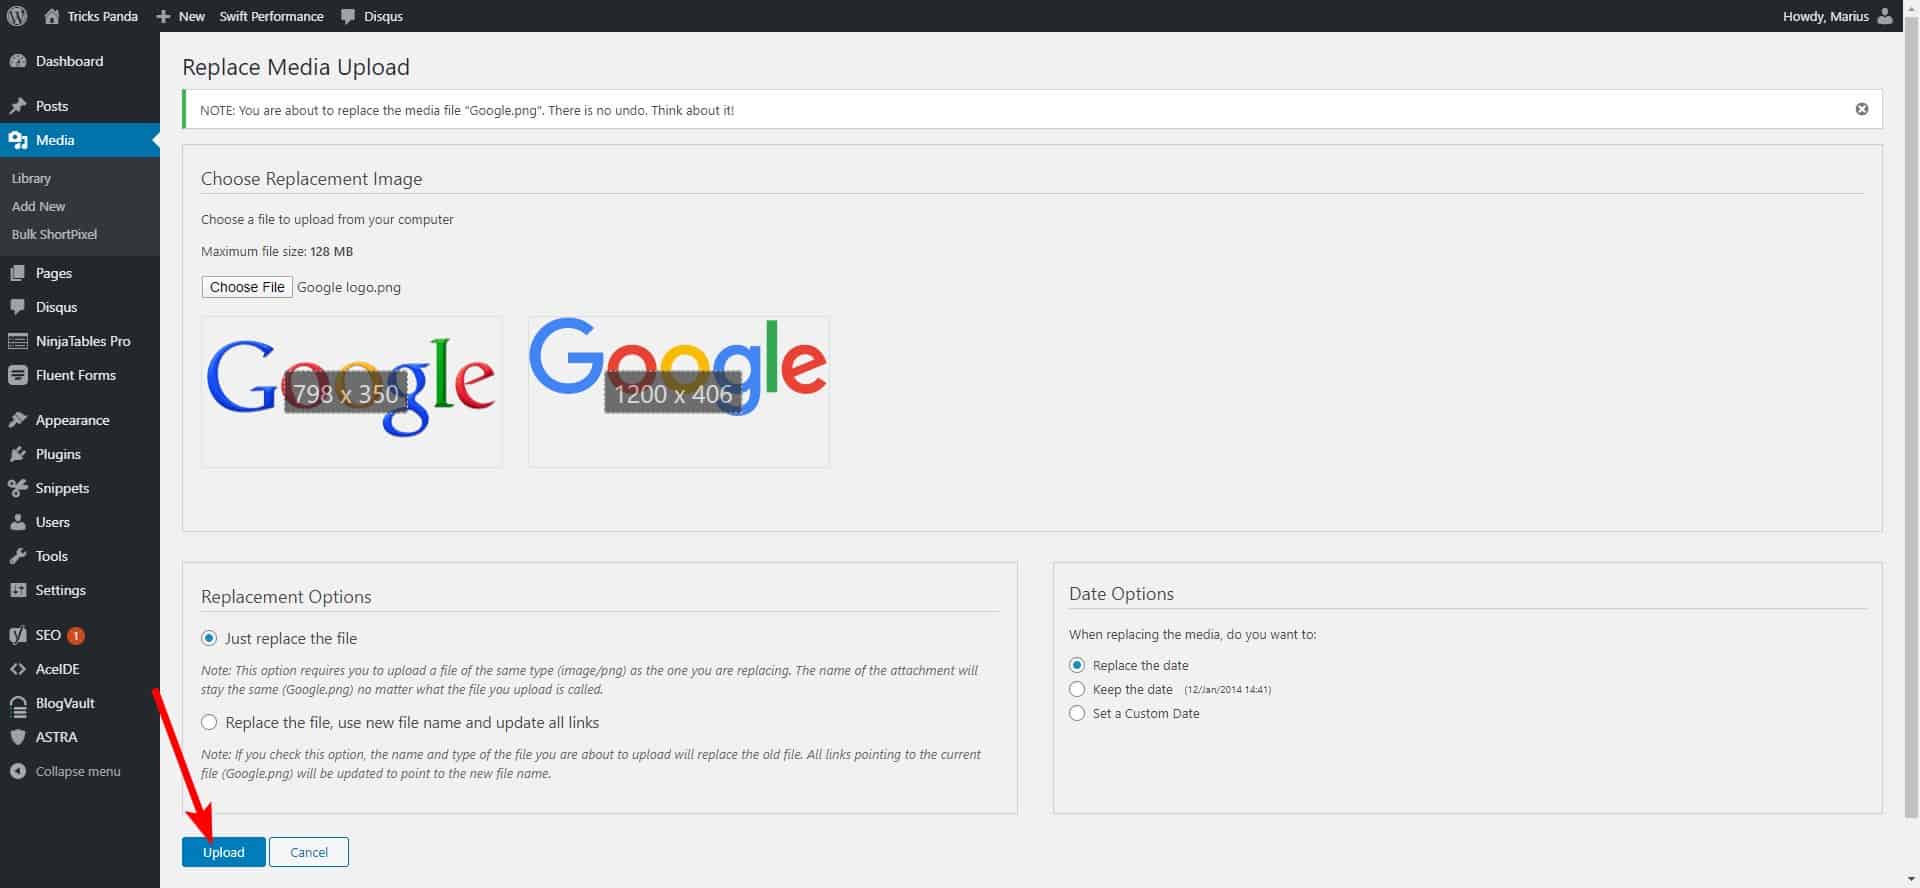
- Click on “Upload” after you have selected the new media file.
You should now see both the old and new images, as in my screenshow below. To avoid any risks and hassle, I recommend to use “Just replace the file” as the replacement option. It’s safer not to try to update the old links too.
That’s it! You have now safely replaced an old media file with a new one, without having to make any changes to the posts and pages where the media file was previously used.